How to Install a Floating Hardwood Floor by Steller
Installing a Steller Floor is so easy that no certifications are required — making it the perfect DIY flooring project.
Once you have ensured your subfloor and indoor climate meet our recommendations, you're ready to unpack your beautiful Steller hardwood floor!
Want to print our 2 page guide? Get the PDF
Step 1: Unpack your Steller Floor & Practice Assembling Planks
Practice snapping together clips and boards to get a sense of just how stress-free this process will be.
Each crate contains:
- Steller Floor Planks
- Steller Floor Clips
- Wax for finishing fresh cuts
- Expanded foam gasket for maintaining a 1/2" expansion gap
Besides what is included in the box, you will need:
- One or more individuals (this can be your family, friends, contractors, or a local handyperson)
- A table saw and miter saw to cut edges
- A non-marking rubber mallet, suction cup and PVC shears (available from us or others)
Step 2: Lay Down the underlayment of your choice
Underlayments are abundant in style and function, but here at Steller Floors, we almost always recommend old faithful - 6 mil polyethelene as a moisture barrier. Of course if you are still allowing vapor to move, you can also use house wrap as well. However, we do not generally recommend very "squishy" underlayments. In our experience, they make the flooring more difficult to install and do not add enough value to justify their cost.
You can read more about underlayments here.
Step 3: Place the foamed gasket spacer around your room
With each Steller Floors order, we provide foamed nitrile gasket that is designed to remind you to leave an expansion space around the edges of your room. This 5/8" spacer will compress if your room gets more humid or expand if your room gets drier - within our specified ranges (35-50%RH). Since your gasket is simply a reminder not to push your floor too far under your baseboards, you can tear it into 1-2 inch long strips and place it 6-8 inches apart and spread it around along your walls. For more detailed descriptions, read more about Steller Nitrile Gasket.
Step 4: Assemble a Section of Flooring to Get Started
With Steller Floors, you can begin your assembly anywhere in the room, and easily push groups of boards from the middle of the floor into uncomfortable turns or edges. Thanks to our patented Steller Assembly System, a 200-square-foot room will fly by as fast as LVP. Watch this video for a demonstration of the assembly process:
Quick Start Guide:
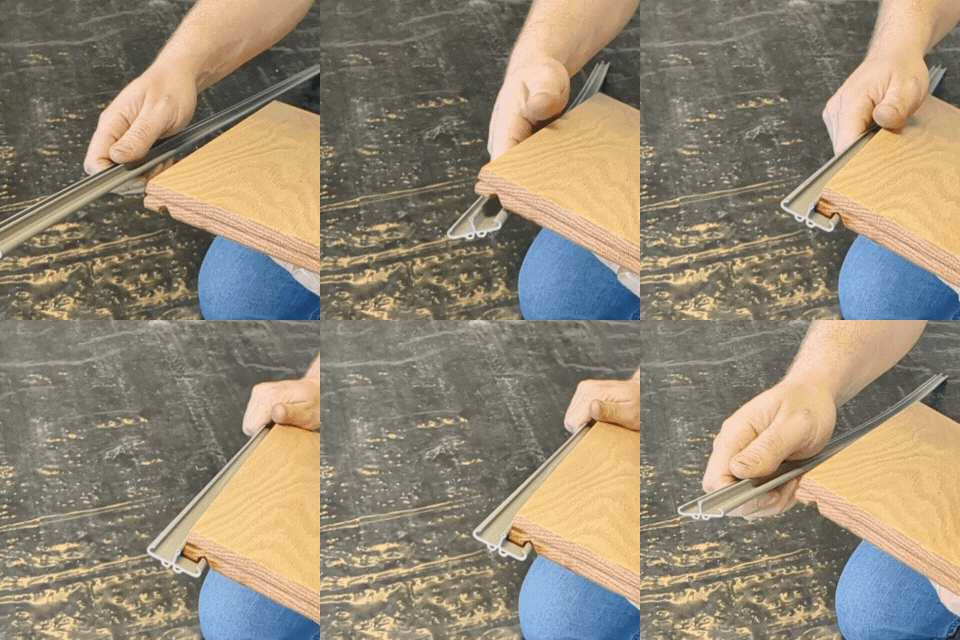
First, snap the arm of a Steller clip into the milled edge of a Steller plank. You can assemble a whole row this way to get started. linking butt ends together using a similar process.
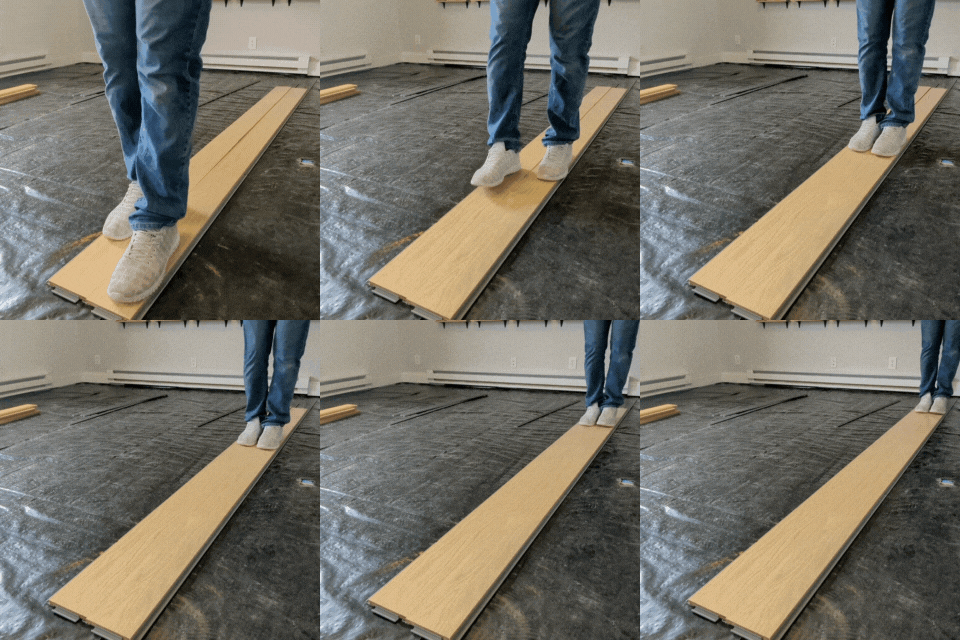
Next, place a new plank (with a clip attached to one side) alongside a fully secured plank (having clips on both sides) with the unclipped edge of the new plank fully overlapping an exposed arm of a clip attached to the fully secured plank. While maintaining down pressure on the surface of the fully secured plank use a quick, light tap along the new plank until milled edges and clips are secure. You can use your hands, stomp with your feet, or use a non-marking rubber mallet.

Continue, using the above process, to join sections of flooring until complete. When you encounter trim and transitions, please read:
Pro Tips: When you reach the opposite wall
When you reach the final row of the room, all you need to do is use a table saw to rip your Steller Floor planks or your a miter saw to shorten the length to fit. Then use the waxy sealant to finish the fresh cuts.
Along the final wall under the trim, the final plank can lay on the subfloor without a final clip against the foam gasket. The distance from the underside of the plank to the floor is a maximum of 0.014" which is about four sheets of printer paper. If you wish you can use ramboard or another incomprehensible material to shim the last row of planks, but it isn't necessary.
In addition, if you don't like working against a wall, you can choose to stop four or five rows short of the final wall and measure the distance to the wall along the rows. Since Steller Floors are manufactured so precisely, you can pre-assemble the final rows and push three or four rows towards the final wall. Then the last row is snapped straight down in the fourth or fifth row back from the wall.
Reach out for Steller Support!
We are here to help you with your flooring project and if any questions begin to vex you, don't hesitate to reach out to us. We can help you troubleshoot over the phone, by email, or by zoom appointment! 1-800-955-7671 or support@floorsbysteller.com